このトピックでは、Reactアプリケーション(ASP.NET Core)にWebデザイナコンポーネントを組み込む方法について説明します。Reactアプリケーションサーバーを実行するには、NodeJSがコンピュータにインストールされている必要があります。
-
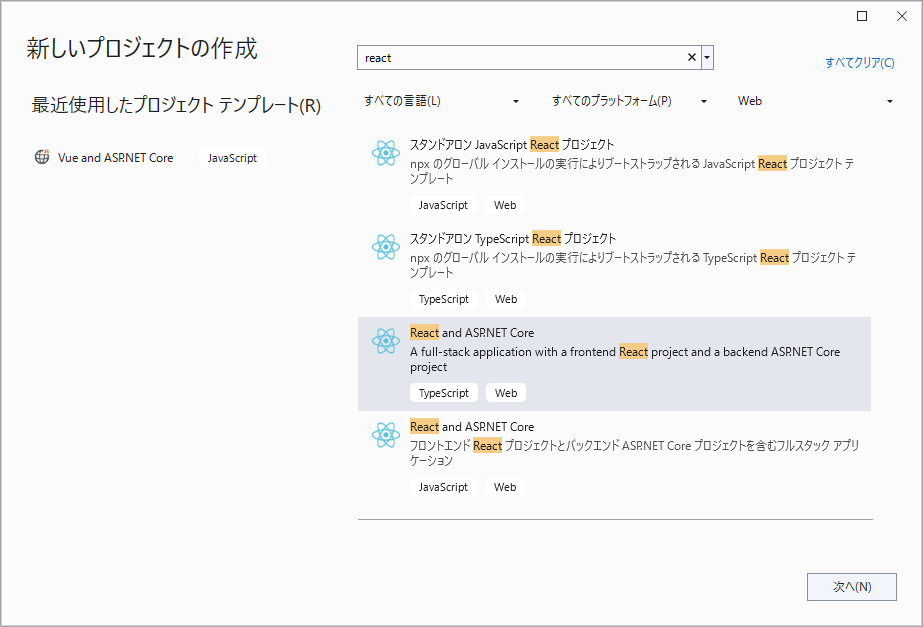
Visual Studio 2022を開き、「React and ASP.NET Core」テンプレートを選択して、新しいプロジェクトを追加します。

-
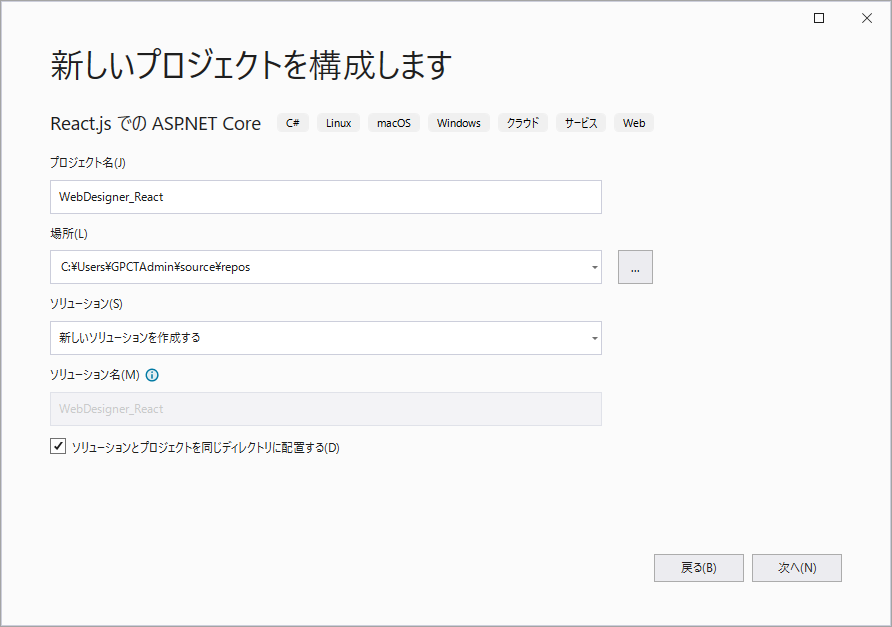
プロジェクト名を入力し、[次へ]をクリックします。

-
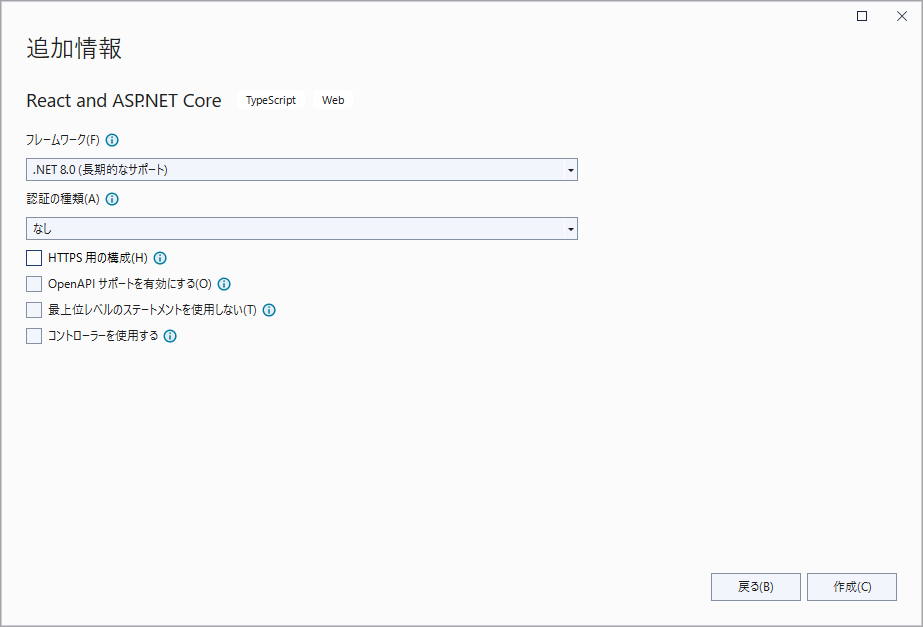
フレームワークとして「.NET 8.0(長期的なサポート)」を選択し、他のオプションのチェックボックスを外します。

-
[ソリューションエクスプローラー]で、ソリューションを右クリックし、[NuGet パッケージの管理]を選択します。
-
次のパッケージをプロジェクトに追加します。
MESCIUS.ActiveReports.Aspnetcore.Designer.ja
MESCIUS.ActiveReports.Aspnetcore.Viewer.ja -
Program.csファイルを開き、上部に次のusingステートメントを追加し、[resources] フォルダを指定してコンテナにサービスを追加します。
Program.cs コードのコピーusing GrapeCity.ActiveReports.Aspnetcore.Designer; using GrapeCity.ActiveReports.Aspnetcore.Viewer; using GrapeCity.ActiveReports.Web.Designer; var builder = WebApplication.CreateBuilder(args); // コンテナにサービスを追加します。 builder.Services.AddReportViewer(); builder.Services.AddReportDesigner(); builder.Services.AddMvc(options => options.EnableEndpointRouting = false); var app = builder.Build(); app.UseHttpsRedirection(); if (!app.Environment.IsDevelopment()) { app.UseDeveloperExceptionPage(); } var ResourcesRootDirectory = new DirectoryInfo(Path.Combine(Directory.GetCurrentDirectory(), "resources")); app.UseReportViewer(config => config.UseFileStore(ResourcesRootDirectory)); app.UseReportDesigner(config => config.UseFileStore(ResourcesRootDirectory, null, FileStoreOptions.NestedFoldersLookup)); app.UseDefaultFiles(); app.UseStaticFiles(); app.Run();
-
.clientプロジェクトでは、package.jsonファイルを開き、「dependencies」の下に次のパッケージを追加します。
"@mescius/activereportsnet-designer-ja": "^18.x.x","@mescius/activereportsnet-viewer-ja": "^18.x.x" -
コマンドプロンプトで「.client」プロジェクトを開き、次のコマンドを実行してnpmパッケージをインストールします。
ビューワに関するファイルとフォルダは、現在のディレクトリにダウンロードされます。".\node_modules\@mescius\activereportsnet-designer-ja\dist"および".\node_modules\@mescius\activereportsnet-viewer-ja\dist"npm install
- ClientApp\srcフォルダ内のcustom.cssを開き、次のcssを追加して、デザイナのホスト要素のサイズを100%に設定します。
custom.css コードのコピー/* 白い背景に対して十分なコントラストを設定します。 */ a { color: #0366d6; } code { color: #E01A76; } .ar-web-designer{ height:100vh; width:100% } .ar-web-designer__loader { display: flex; width: 100%; height: 100%; background-color: #205f78; color: #fff; font-size: 18px; animation-name: arwd-loader; animation-duration: .62s; animation-timing-function: ease-in-out; animation-iteration-count: infinite; animation-direction: alternate; justify-content: center; align-items: center } .btn-primary { color: #fff; background-color: #1b6ec2; border-color: #1861ac; }
- 既存のApp.cssファイルの「root」セレクターを次のように更新します。
App.css コードのコピー#root { width: 100%; } -
App.jsxファイルを選択し、そのコードを次のコードに置き換えます。
App.jsx コードのコピーimport { Component } from 'react'; import { arWebDesigner } from '@mescius/activereportsnet-designer'; import { createViewer } from '@mescius/activereportsnet-viewer'; import "@mescius/activereportsnet-designer/dist/web-designer.css"; import "@mescius/activereportsnet-viewer/dist/jsViewer.min.css"; import './custom.css'; import './App.css'; export default class App extends Component { constructor() { super(); } componentDidMount() { console.log("componentDidMount"); arWebDesigner.create('#ar-web-designer', { rpx: { enabled: true }, appBar: { openButton: { visible: true } }, data: { dataSets: { visible: true, canModify: true }, dataSources: { canModify: true } }, preview: { openViewer: (options) => { if (this.viewer) { this.viewer.openReport(options.documentInfo.id); return; } this.viewer = createViewer({ element: '#' + options.element, reportService: { url: 'api/reporting', }, reportID: options.documentInfo.id }); } } }) } componentWillUnmount() { console.log("componentWillUnmount"); this.viewer?.destroy(); arWebDesigner.destroy('#ar-web-designer'); } render() { return ( <div id="ar-web-designer" className="ar-web-designer"><span className="ar-web-designer__loader"><b>AR WebDesigner</b></span></div> ); } } -
vite.config.jsファイルを開き、「proxy」セクションを次のように更新します。
vite.config.js コードのコピーproxy: { '/api':{ target: 'http://localhost:5267', secure: false } } -
React 17 以降を使用する場合、「main.jsx」ファイルを開き、「
import React from 'react'」ステートメントを削除し、<React.StrictMode>および</React.StrictMode>ステートメントを削除して厳密モードを無効にします。最終的なmain.jsxは次のようになります。main.jsx コードのコピーimport ReactDOM from 'react-dom/client' import App from './App.jsx' import './index.css' ReactDOM.createRoot(document.getElementById('root')).render( <App /> )
-
[ビルド] > [ソリューションのビルド]をクリックして、ソリューションをビルドします。F5を押して実行します。