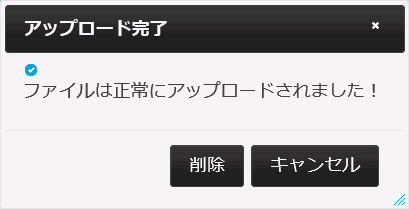
C1Dialog は、ごみ箱を空にするなどのユーザーの操作を確認するためにも使用できます。このトピックでは確認ダイアログウィンドウを作成します。
以下の手順を実行します。
- プロジェクトのソースビューに移動します。
-
<cc1:C1Dialog>タグの最初のペアを探して、runat="server"プロパティの後に次のスクリプトを挿入します。ソースビュー コードのコピー<script type="text/javascript">
function delClick() {
$(this).c1dialog("close");
}
function cancelClick() {
$(this).c1dialog("close");
}
</script>
</asp:Content> -
<cc1:C1Dialog>タグを探します。runat="server"の後ろに次のマークアップを挿入します。ソースビュー コードのコピー<cc1:C1Dialog ID="C1Dialog1" runat="server"Title="アップロード完了"
Modal="True" CloseText="Close">
<Content>
<p>
<span class="ui-icon ui-icon-circle-check"></span>ファイルは正常にアップロードされました!
</p>
</Content>
<ExpandingAnimation Duration="400" />
<CollapsingAnimation Duration="300" />
<Buttons>
<cc1:DialogButton onclientclick="delClick" text="削除" />
<cc1:DialogButton onclientclick="cancelClick" text="キャンセル" />
</Buttons>
<CaptionButtons>
<Pin Visible="false" />
<Refresh Visible="False" />
<Toggle Visible="False" />
<Minimize Visible="False" />
<Maximize Visible="False" />
</CaptionButtons>
- プログラムを実行します。確認ダイアログウィンドウは、次の図のようになるはずです。
