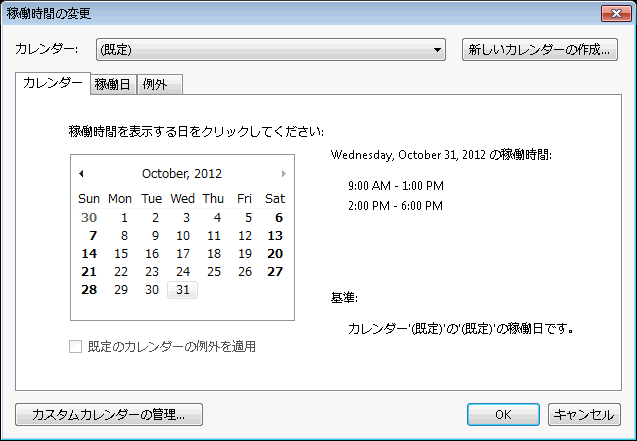
稼働時間の変更 ダイアログボックスは、指定したカレンダーの稼働時間を変更するときに使用します。カレンダーを指定:ドロップダウンリストボックスで変更するカレンダーを選択するか、新しいカレンダーを追加をクリックして新しいカレンダーを作成するか、あるいは別のカレンダーに基づくカレンダーのコピーを作成します。これはデフォルトのカレンダーを変更するのではなく、新しいカレンダーを作成したい場合に便利です。
[稼働時間の変更]ダイアログボックスにアクセスするには
C1GanttView ツールバー の 稼働時間の変更 ボタン をクリックします。
The Change Working Time dialog box appears as the following:

To change the working time, follow the given steps:
- From the For calendar dropdown, select the calendar you wish to change. You can select the Add New Calendar button to create a new calendar or a copy of a calendar based on another calendar.
- Click on the Manage Custom Calendars if you wish to add or remove the custom calendars.
- Set the working time for the selected or added calendar.
- Once you are finished with changing the working time in your schedule click OK to apply your changes to your calendar and close the Change Working Time dialog box.
This changes the working time for the selected calendar.
カレンダー タブ
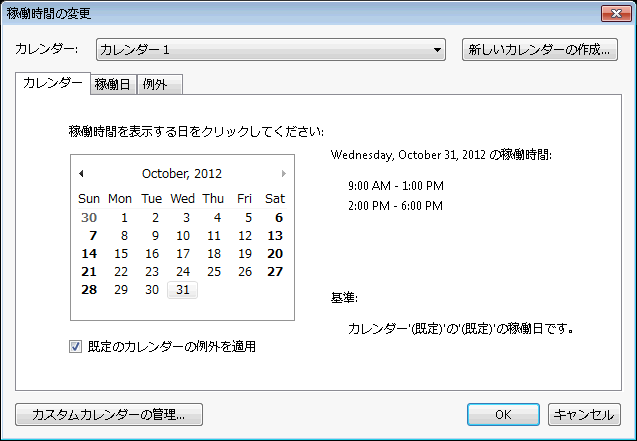
カレンダー タブでは、デフォルトカレンダーの日付をクリックして、デフォルトカレンダーの稼働日に基づくその日の稼働時間を表示したり、デフォルトカレンダー例外を適用するかどうかを確認したりできます。
The following image displays the Calendar Tab in the Change Working Time dialog box.

「稼働日」タブ
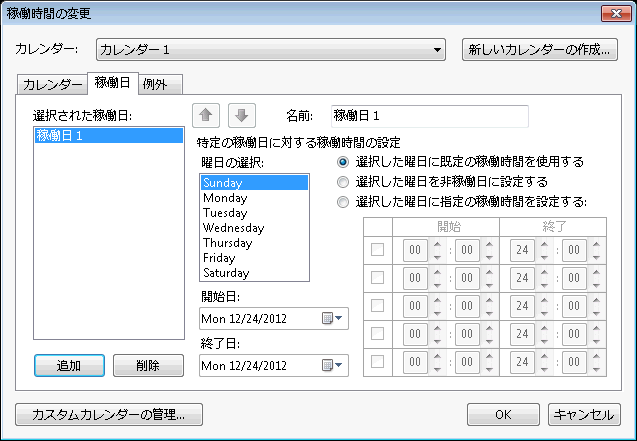
稼働日 タブでは、プロジェクトカレンダー、リソースカレンダー、または新規作成したカレンダーのデフォルト稼働日を変更できます。週末に個人指導を行う週など、特定の日付範囲にデフォルト稼働日とは異なる追加のスケジュールを選択また作成することができます。

To change the work week, follow the steps given below:
- Click Add button to add a work week, and type a descriptive name for the work week in the Name textbox.
This creates a new work week in the Work Week list. - Enter the start date in the Start date dropdown listbox and finish date in the Finish date dropdown listbox
-
Select the day(s) for which you want to change the schedule and choose one of the following:
- Use Default working times for these days: Choose the days that should use the default working times.
- Set days to nonworking time: Choose the days on which no work can be scheduled.
- Set days to these specific working times: To set the working times for the selected days throughout the schedule, type the times that you want work to start in the From boxes and the times you want work to end in the To boxes.
「例外」タブ
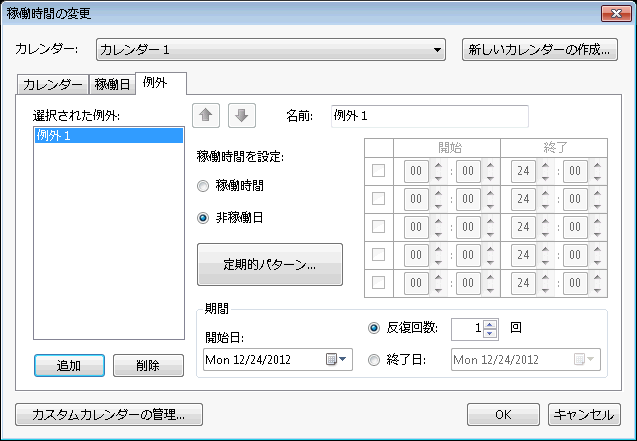
Exceptions Tab lets you define a calendar exception without you having to worry about the scheduled tasks as any task scheduled around the calendar exception will automatically be rescheduled. This is useful in declaring company holidays and so on.

To add an exception, follow the steps given below:
- In the Exceptions tab, click the Add button to add a calendar exception.
- Type a descriptive name for the exception, such as Company Holiday, in the Name textbox.
- Enter the start and finish dates of exception in the Start date dropdown listbox and the End by dropdown listbox respectively.
- Click the Recurrence Pattern… button if the exception will be repeated throughout the section of the schedule.
The Recurrence Pattern dialog box appears. - In the Recurrence Pattern dialog box, specify the first, second, third, fourth, or last item in the Recur every dropdown listbox.
- Then, select the days that the recurrence will occur.
- Specify the day, month, year, and the number of times it will occur.
This adds a recurring exception to your calendar.