This section provides a visual and descriptive overview of the settings available to customize the appearance of the SuperTooltip for WinForms controls.
C1SuperTooltip の背景のグラデーション
C1SuperTooltip の外観はBackgroundGradient プロパティを変更することですばやく簡単にカスタマイズできます。 BackgroundGradient プロパティは、デザイン時にプロパティウィンドウから簡単にアクセスできます。または、C1SuperTooltip タスク メニューから 背景のグラデーション ドロップダウンボックスを選択します。 デフォルトでは、BackgroundGradient プロパティは 自動に設定されています。

C1SuperTooltip では次の背景のグラデーションを使用できます。
|
背景のグラデーション |
プレビュー |
|---|---|
|
なし |
 |
|
自動 |
 |
|
銀色 |
 |
|
青 |
 |
|
金 |
 |
|
オリーブ |
 |
|
Vista |
 |
C1SuperTooltip の形状
IsBalloon プロパティと RoundedCorners プロパティを使用することで、C1SuperToolTip の外観をカスタマイズできます。
IsBalloon プロパティと RoundedCorners プロパティは、プロパティウィンドウからアクセスできます。 また、IsBalloon プロパティは、C1SuperTooltip タスク メニューからもアクセスできます。
C1SuperTooltip では次の形状設定を使用できます。
|
形状設定 |
プレビュー |
|---|---|
| IsBalloon = False RoundedCorners = False | 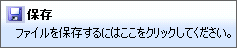 |
| IsBalloon = False RoundedCorners = True | 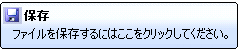 |
| IsBalloon = True RoundedCorners = False | 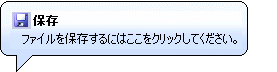 |
IsBalloon プロパティと RoundedCorners プロパティの両方が False に設定されている場合(デフォルト)、ツールチップは矩形として表示されます。 RoundedCorners が True に設定されている場合、ツールチップは角丸の四角形として表示されます。 IsBalloon が True に設定されている場合、ツールチップは吹き出し型で表示されます。
C1SuperTooltip の影
Shadow プロパティを設定することで、C1SuperTooltip の下に影を付けるかどうかを決定できます。 デフォルトでは、Shadow プロパティは True に設定されています。
Shadow プロパティには、プロパティウィンドウからアクセスできます。
C1SuperTooltip には次の影設定を使用できます。
|
形状設定 |
プレビュー |
|---|---|
| Shadow = True | 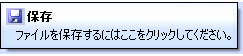 |
| Shadow = False | |
You can change the appearance and behavior settings of your ToolTips two different ways: using the C1SuperTooltip Editor or using the C1SuperTooltip control, through its smart tag and the Properties window.
Changing the settings in the C1SuperTooltip Editor
In the C1SuperTooltip Editor, you can use the Office tab to add images, a title, a subtitle, and the body text of the ToolTip. C1SuperTooltip automatically creates all of the HTML code behind the ToolTip, saving you time and work. You can create the same ToolTip by entering all of your own HTML code on the Html tab of the editor if you choose not to have the editor do it for you. When using these two tabs, the changes you make and the settings you specify are applied only to the ToolTip for the control you have selected in your form.
The Properties tab, however, allows you to change the overall appearance and behavior of the ToolTip, which will be applied to all controls associated with it.
- In your project, select the control for which you are creating a C1SuperTooltip.
- In the Properties window, click the ellipsis button next to the ToolTip on C1SuperTooltip1 property for the control to open the C1SuperTooltip Editor.
- Select the Properties tab.

- Set the following properties:
- Click the drop-down arrow next to the BackColor property, select the Web tab, and choose a color.
- Set the BackgroundGradient property to None. The background color will not appear if this property is set to a value other than None.
- Click the drop-down arrow next to the ForeColor property, select the Web tab, and choose a color.
- Set the Shadow property to False.
- Set the Border property to False.
- Expand the Font property node and set the Size to 14.
- To change the amount of time, in milliseconds, the ToolTip remains visible when the mouse hovers over each button, set the AutoPopDelay property to 1000.
- Run the project and mouse over the control with the associated ToolTip. The ToolTip will appear something like the following image, depending on the settings you used.

Changing the settings using the C1SuperTooltip Control
You can use the C1SuperTooltip smart tag to determine the background gradient for the ToolTip and whether it appears within a balloon shape or a rectangular box. For more information, see C1SuperTooltip Tasks and Context Menus.
You can use the Visual Studio Properties window to change all of the C1SuperTooltip properties. This is the same list of properties you will find on the Properties tab of the C1SuperTooltip Editor.
- Right-click the C1SuperTooltip control and select Properties to access the Properties window.
- Set the desired properties.