This topic guides you through the steps of creating and configuring a WinUI application using the WinUI 3 project templates in Visual Studio 2019. First, you need to make sure to check the System Requirements before proceeding.
Once all the prerequisites are installed on your system along with the Project Reunion extension, the Visual Studio WinUI 3 Project template appears in the templates list for creating a WinUI application. You need to perform the following steps to configure the project created using the Visual Studio project template and use the ComponentOne WinUI controls.
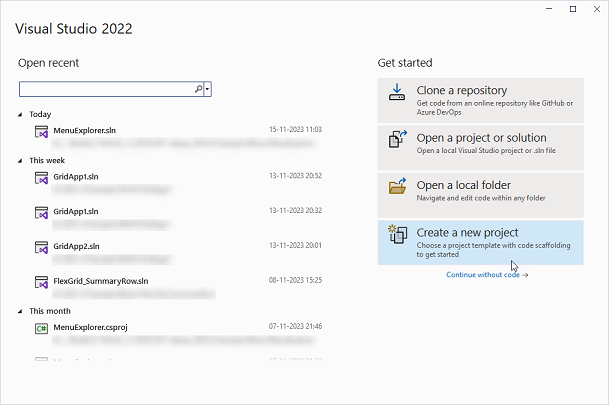
- Open Visual Studio and select Create a new project.

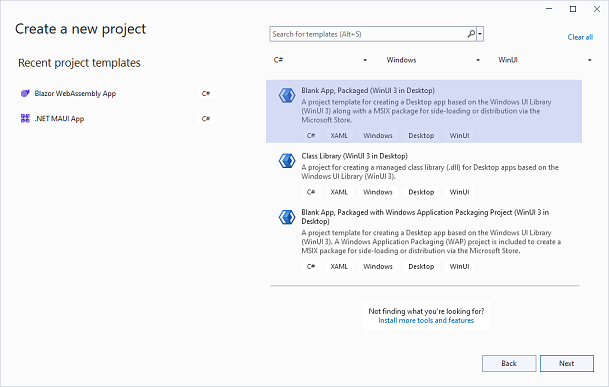
- In the Create a new project window, select C# from the language drop-down, Windows from the platform drop-down and WinUI from the project drop-down.
- Select the Blank App, Packaged (WinUI 3 in Desktop) project type and click Next.

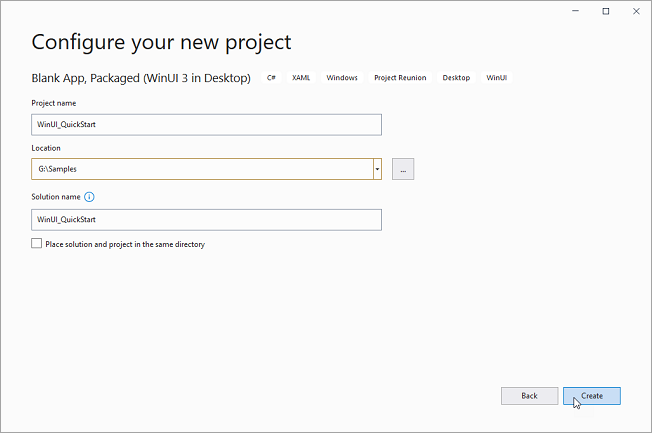
- In the Configure your new project window, set a Name and Location for your application. Click Create.

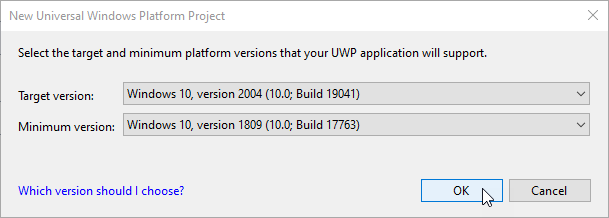
- In the New Universal Windows Platform Project dialog box, set the Target version to Windows 10, version 2004 (build 19041) and Minimum version to Windows 10, version 1809 (build 17763) and click OK.

These steps create two projects in Visual Studio which are described below:
| Projects | Description |
|---|---|
| Your Project name (Desktop) | Contains your application's code |
| Your Project name (Package) | A Windows Application Packaging Project that builds your application to an MSIX application |
After creating a WinUI application, you can start using ComponentOne WinUI controls by installing any of the following NuGet packages as per your requirements:
- C1.WinUI.Accordion
- C1.WinUI.Calendar
- C1.WinUI.Core
- C1.WinUI.DataPager
- C1.WinUI.Grid
- C1.WinUI.Input