This quick start guide is intended to get you up and running with FlexPivot. In this section, you begin by connecting the FlexPivotPage control to C1NWind database. You also understand how to bind FlexPivotPage control to a local data source, and then continue exploring various features available in the control at runtime.
Set up the Application
- Create a WPF App in Visual Studio.
- From the ToolBox, double-click the FlexPivotPage to add it to the Grid.
The reference assemblies get automatically added to the Dependencies.
Bind FlexPivotPage to DataSource
- Invoke the Window_Loaded event, and switch to the code view.
- Add the following code to the Window_Loaded event to establish connection to the C1NWind database and fetch data from it using the following code:
C# コードのコピー//データベースへの接続し、データを取得します OleDbConnection oconn = new OleDbConnection(); oconn.ConnectionString = @"Provider=Microsoft.ACE.OLEDB.12.0;Data Source=..\..\Documents\ComponentOne Samples\Common\C1NWind.mdb"; var da = new OleDbDataAdapter("select * from invoices", oconn); var dt = new DataTable(); da.Fill(dt);
- Bind the datatable to FlexPivot's FlexPivotEngine in the Window_Loaded event using the FlexPivotPanel.FlexPivotEngine property as shown in the following code:
C# コードのコピー//データテーブルをFlexPivotのFlexPivotEngineに連結します var fpEngine = flexPivotPage.FlexPivotPanel.FlexPivotEngine; fpEngine.DataSource = dt.DefaultView;
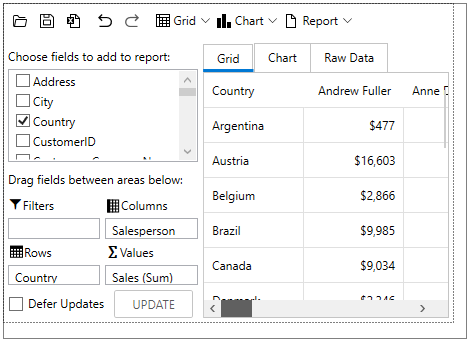
Create and Add Views
To create a view, add row, column and value fields to the FlexPivotEngine using RowFields, ColumnFields and ValueFields properties of the FlexPivotEngine class, respectively, using the following code in the Window_Loaded event:
| C# |
コードのコピー
|
|---|---|
fpEngine.BeginUpdate(); //行、列、値の各フィールドを追加してビューを作成します fpEngine.RowFields.Add("Country"); fpEngine.ColumnFields.Add("Salesperson"); fpEngine.Fields["ExtendedPrice"].Caption = "Sales"; fpEngine.Fields["ExtendedPrice"].Format = "c0"; fpEngine.ValueFields.Add("ExtendedPrice"); fpEngine.EndUpdate(); |
|