The GanttView grid comprises of rows and columns to record information. Here, the collection of columns is represented by the ColumnCollection class which is accessible through Columns property of the C1GanttView class.
The following section walks you through different operations that can be performed on columns in the GanttView control.
Add Columns
By default, the GanttView has empty rows and columns. However, you can display the required columns in the GanttView grid by adding them to the ColumnCollection using Columns property of the C1GanttView class.
Use the following code to add columns to the GanttView. The following code adds the duration column to the control.
| C# |
コードのコピー
|
|---|---|
TaskPropertyColumn taskPropertyColumn1 = new TaskPropertyColumn(); taskPropertyColumn1.Caption = "Duration"; taskPropertyColumn1.ID = 1437604830; taskPropertyColumn1.Property = TaskProperty.Duration; gv.Columns.Add(taskPropertyColumn1); |
|
Besides, you can also add columns at runtime using the ColumnCollection Editor of GanttView as showcased in the following steps:
- In the ColumnCollection Editor, click the Grid Columns button to open the Grid Columns dialog box.
- The Grid Columns dialog box displays a list of existing columns along with checkboxes. Select the checkbox next to the column to add it to the grid and click OK.
Move Columns
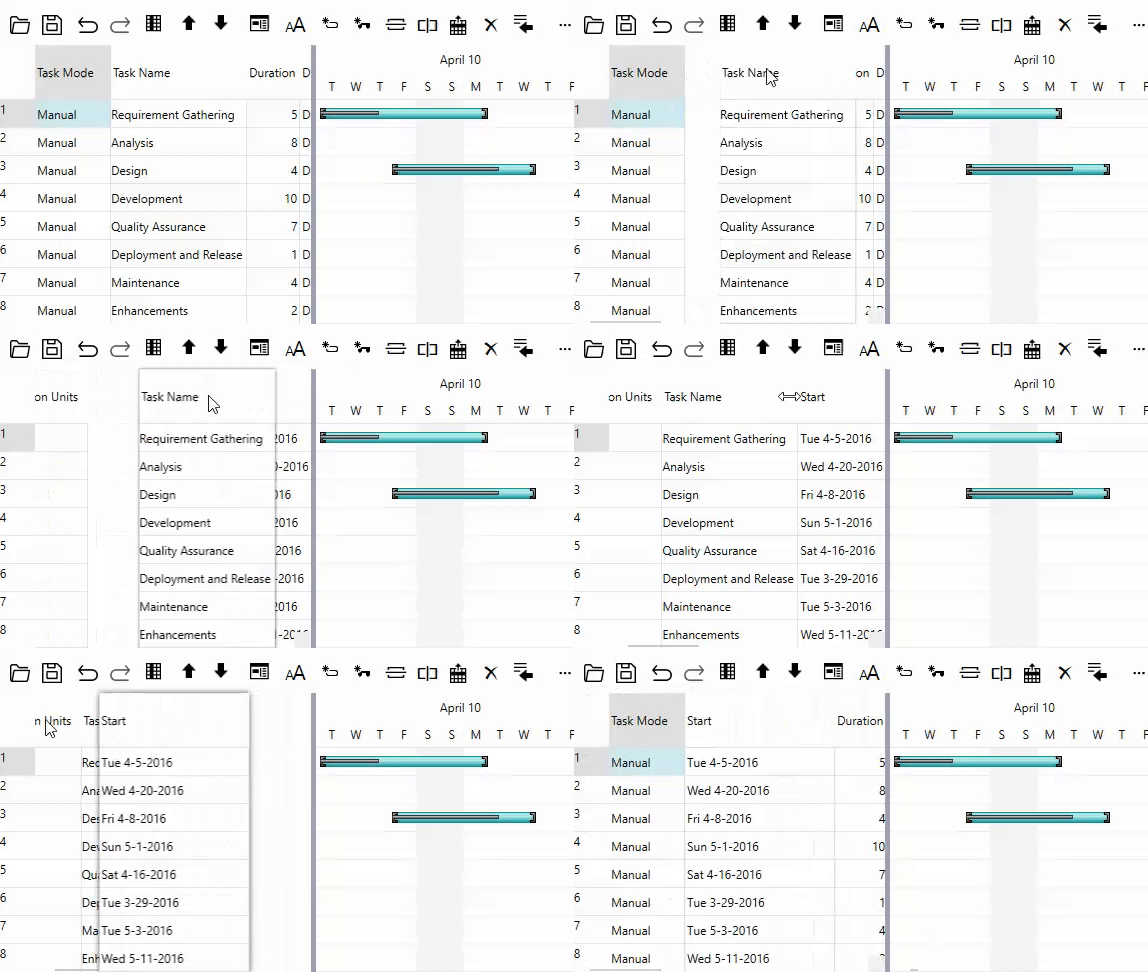
GanttView allows you to move columns to occupy new position in the grid by simply dragging and dropping them to the desired position.
The following GIF shows how you can move columns in GanttView.

Custom Columns
In addition to task property columns, users can also create custom columns as per their requirements. It provides the CustomFieldColumn class, which can be used to create custom columns. The CustomFieldColumn class also provides a set of properties to specify various attributes of a custom column. For instance, the DataType property can be used to set the data type of column, while the Format property can be used to specify the format in which the data is to be displayed.
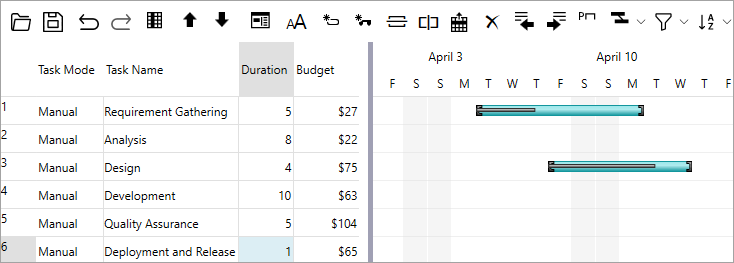
The following image shows a GanttView with a custom column titled 'Budget' that accepts numeric data and displays the same in '$' format.

To create custom columns, create an object of the CustomFieldColumn class and set its basic properties such as Name, Caption, Format, and DataType as demonstrated in the following code. This example uses the sample created in the Quick Start topic.
| C# |
コードのコピー
|
|---|---|
// カスタム列を作成します。 CustomFieldColumn customColumn = new CustomFieldColumn(); customColumn.Caption = "Budget"; customColumn.Name = "Budget"; customColumn.DataType = typeof(decimal); customColumn.Format = "$#0"; customColumn.Width = 100; gv.Columns.Add(customColumn); |
|