In the previous steps, you created a WPF application, added the RichTextBox and RichTextBoxToolbar controls, and added spell-check functionality to the application. Run the application and try out some possible runtime interactions.
- Press F5 to run the application.
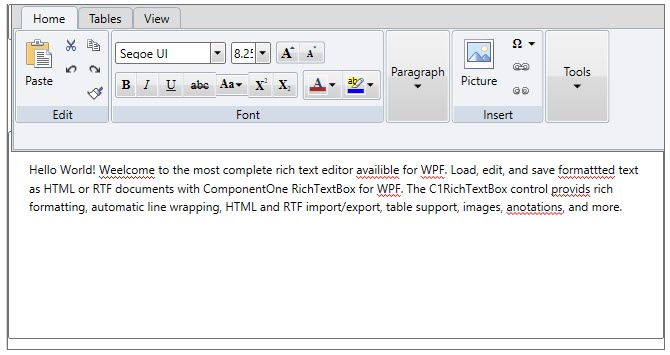
Note that as you type, spell-checking is visibly implemented as indicated by wavy red lines under words not included in the dictionary.
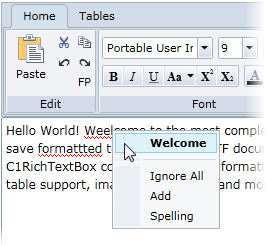
- Right-click the first misspelled word, "Welcome", and from the options that appear, choose the correct spelling:
- Click the Spell Check button in the Tools group. The Spelling dialog box appears
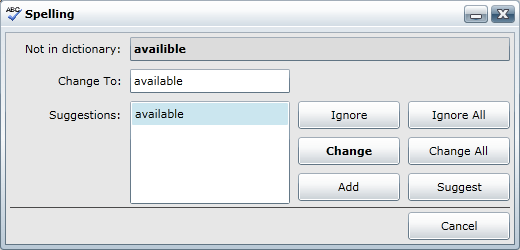
- Click Change to accept the suggested spelling. The dialog box moves onto the next word.
- Click Add in the Spelling dialog box to add "WPF" to the dictionary.
- Click Change for each of the following words to accept the suggested spellings.
- Use the mouse to highlight "ComponentOne RichTextBox for WPF" and click the Bold button in the Font group to bold the text.
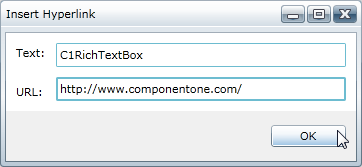
- Highlight "C1RichTextBox" and click the Hyperlink button in the Insert group to open the Insert Hyperlink dialog box.
- In the URL box of the Insert Hyperlink dialog box, enter https://developer.mescius.com and click OK to close the dialog box. The link will be added.
The text gets linked to the ComponentOne website.
- Highlight the "Hello World!" text and click the Font Color drop-down box in the Font group and choose Red to turn the text red.
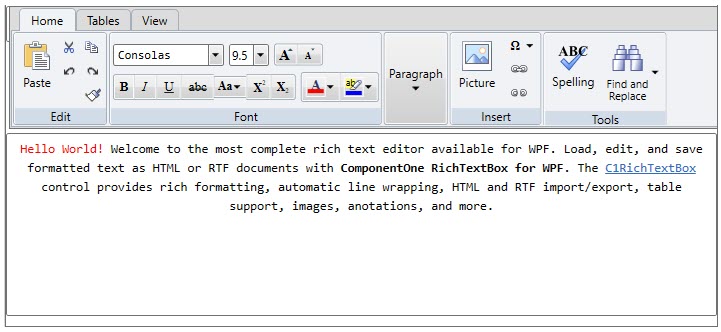
- Highlight the entire paragraph and click the Align Text Center button in the Paragraph group to align the text. The application will now appear similar to the following:
What You've Accomplished
Congratulations, you successfully completed this Quick Start tutorial! You learned about using the RichTextBox and RichTextBoxToolbar controls, and also viewed some possible run-time interactions.