Xuni ICollectionView インタフェースは、ListBox、FlexGrid などのデータコントロールのグループ化をサポートします。グループ化を有効にするには、1 つ以上の GroupDescription オブジェクトを CollectionView.groupDescriptions プロパティに追加します。GroupDescription オブジェクトは柔軟であり、値またはグループ化関数に基づいてデータをグループ化できます。
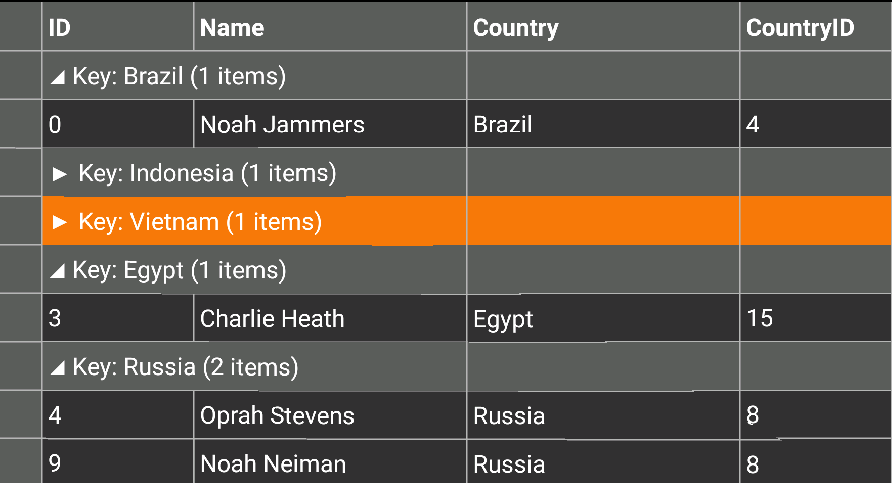
次の図は、FlexGridのサンプルを利用しCountryの列に基づいてグループ化した例です。
次のコード例は、C# と XAML でこのプロパティを設定する方法を示します。この例では、「クイックスタート」セクションで作成したCustomer.csをデータとして利用して作成します。
- 新しい Forms XAML ページの
Grouping.xamlをプロジェクトに追加します。 - FlexGrid コントロールを初期化して、
<ContentPage></ContentPage>間のマークアップを以下のように変更します。XAML のコード
XAML コードのコピー<ContentPage xmlns="http://xamarin.com/schemas/2014/forms" xmlns:x="http://schemas.microsoft.com/winfx/2009/xaml" x:Class="App1.Grouping" xmlns:xuni="clrnamespace:Xuni.Forms.FlexGrid;assembly=Xuni.Forms.FlexGrid"> <ContentPage.ToolbarItems> <ToolbarItem x:Name="tb_Collapse" Text="Collapse"></ToolbarItem> </ContentPage.ToolbarItems> <StackLayout> <Grid VerticalOptions="FillAndExpand"> <xuni:FlexGrid x:Name="grid" /> </Grid> </StackLayout> </ContentPage>
- ソリューションエクスプローラーで
Grouping.xamlノードを展開し、Grouping.xaml.csを開いて C# コードビハインドを表示します。 - 以下のコードを Grouping クラスコンストラクターに追加して、FlexGrid コントロールにCountry列でグループ化したデータを表示します。
C# のコード
C# コードのコピーXuniGroupedCollectionView<string, Customer> colView; Func<Customer, string> selector; public Grouping() { InitializeComponent(); this.tb_Collapse.Command = new Command((s) => { this.grid.CollapseGroups(); }); UpdateColView(); } private async void UpdateColView() { selector = x => x.Country; colView = new XuniGroupedCollectionView<string,Customer>(selector); await colView.SetSourceAsync(App3.Customer.GetCustomerList(10)); this.grid.ItemsSource = colView; }