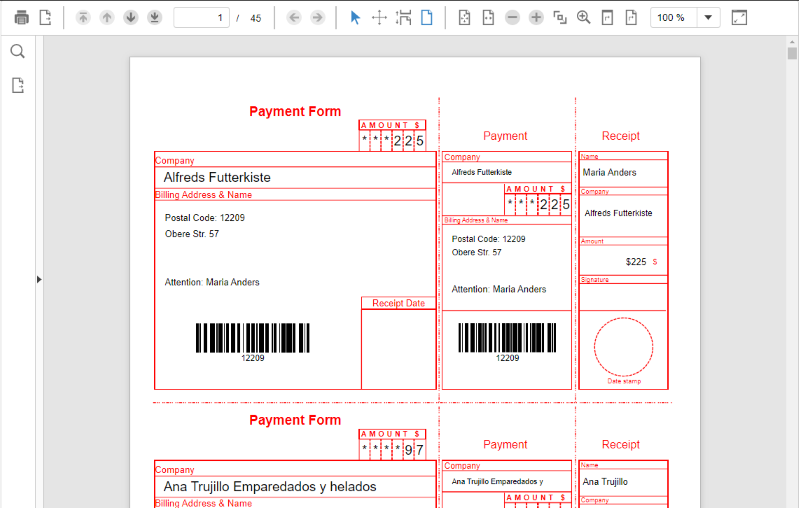
You can configure the ActiveReports service locally in an ASP.NET Core MVC application to view ActiveReports in FlexViewer. To view ActiveReports in the FlexViewer control using the ActiveReports Web Service, follow the steps given below.

Note: Make sure that the latest version of ActiveReports is installed on your system, before implementing the steps mentioned below. In our case, we are using ActiveReports 13.
- Create a new ASP.NET Core MVC application using the ComponentOne or Visual Studio templates. For more information about creating an ASP.NET Core MVC application, see Configuring your MVC Application topic.
- Add the FlexViewer library to your application.
- If using ComponentOne template, select "Include FlexViewer Library" option from the ComponentOne ASP.NET MVC Application Wizard.
- If using Visual Studio template, add the
C1.AspNetCore.Mvc.FlexViewer.jaNuGet package and the following TagHelper in the _ViewImports.cshtml file.
@addTagHelper *, C1.AspNetCore.Mvc
@addTagHelper *, C1.AspNetCore.Mvc.FlexViewer
- In the same solution, add an ASP.NET MVC application using the ComponentOne or Visual Studio templates. For more information about creating an MVC application, see Configuring your MVC Application.
- Add the FlexViewer library to your application.
- If using ComponentOne template, select "Include FlexViewer Library" option from the ComponentOne ASP.NET MVC Application Wizard.
- If using Visual Studio template, add the
C1.Web.Mvc.FlexViewer.dllreference and the following markup in <namespace></namespace> tags belowC1.Web.Mvcmarkup.
<add namespace="C1.Web.Mvc.Viewer" />
<add namespace="C1.Web.Mvc.Viewer.Fluent" />
- In the SolutionExplorer, right click the project name and then select Add | New Item to open the Add New Item wizard.
- In the Add New Item wizard, on the left panel under the installed templates, select Reporting | ActiveReports 13 Web Service and then click Add. As soon as you add the service, you will notice that it adds all the dependent assembly references and updates the Web.Config file to include instances of assembly references and http handlers.
- Add the following code in the App_Start | RouteConfig.cs file.
C# コードのコピーroutes.IgnoreRoute("{resource}.axd/{*pathInfo}"); routes.IgnoreRoute("{*allActiveReport}", new { allActiveReport = @".*\.ar12(/.*)?" });
- Add a folder named Reports to your application. In the Reports folder, add the BillingInvoice.rdlx report file from the following location:
Documents\GrapeCity Samples\ActiveReports (latest version)\Reports Gallery\Reports\Page Report\Invoice - In Web.config file, update the Reports folder path to make it accessible for the application.
C# コードのコピー<ActiveReports13> <WebService reportsFolder="~/Reports" assemblyFolder="~/" /> </ActiveReports13>
- Add the following code in Views | Home | Index.cshtml file, to initialize the FlexViewer control and view an Active Report using ActiveReports 13 Web Service.
Index.cshtml コードのコピー@(Html.C1().ReportViewer() .ServiceUrl(@"~/ActiveReports.ReportService.asmx") .FilePath("BillingInvoice.rdlx"))
- Open the Views | Home | Index.cshtml file from the ASP.NET Core MVC application and add the following code, to initialize the FlexViewer control and view an Active Report using ActiveReports 13 Web Service.
Index.cshtml コードのコピー<c1-report-viewer file-path="BillingInvoice.rdlx" service-url=@"~/ActiveReports.ReportService.asmx"> </c1-report-viewer>