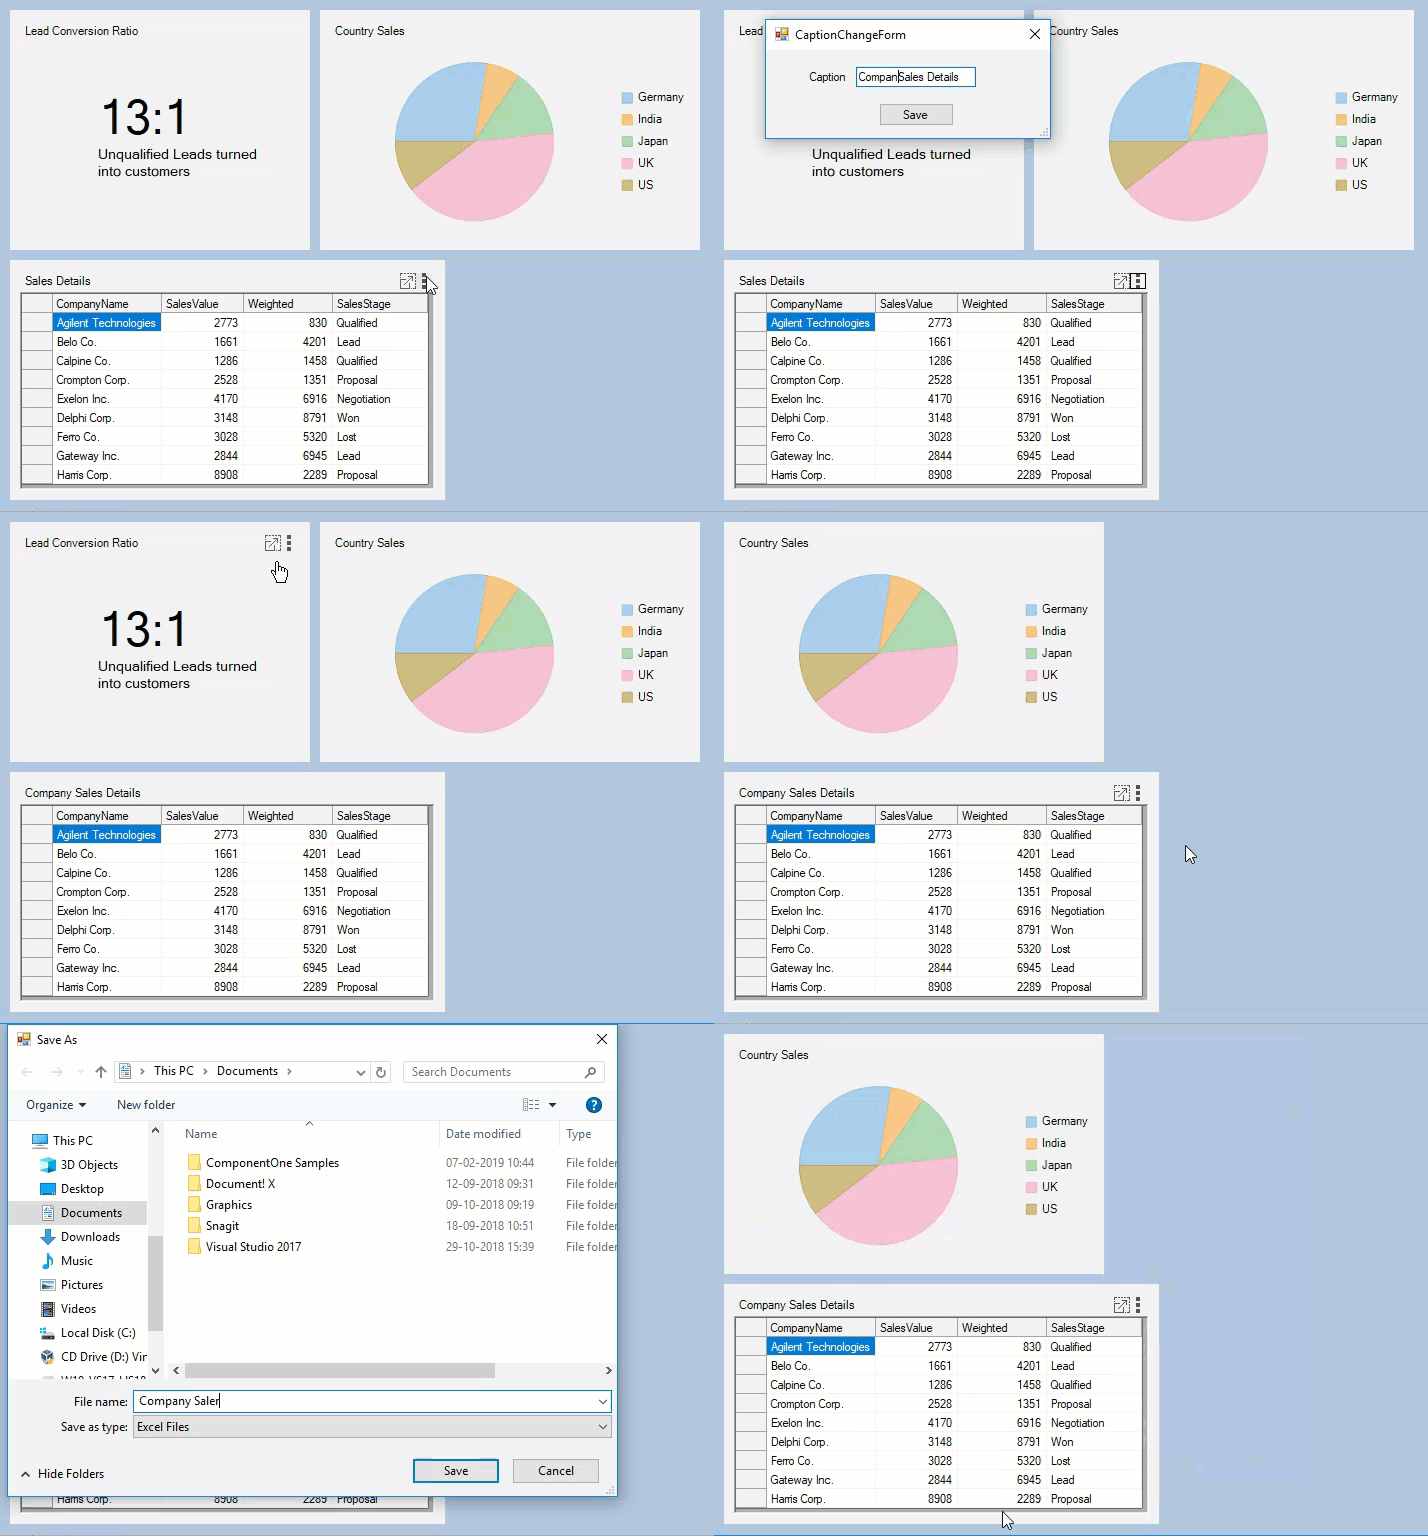
This topic guides you through the steps to create custom context menu that provides you the options to change caption of the item container, export control, change image, and remove the item container from the DashboardCollection.

- Create a new Windows Forms App.
- Drag and drop a DashboardLayout control from the Toolbox onto your form.
Observe: By default, a layout of the type Split is attached to it. - Select the DashboardLayout control. In the Properties window, set the following properties:
Property Name Value LayoutType Flow Dock Fill - Click inside the DashboardLayout control. The FlowContentPanel (layout control attached to the DashboardLayout) is selected.
- Drag and drop the FlexGrid control on the DashboardLayout and set the following properties:
Property Name Value Caption on c1DashboardLayout Sales DataSource tenMostExpensiveProductsBindingSource
To create the data source and bind it to the control, follow the steps provided in the クイックスタート. - Drag and drop the FlexChart control on the DashboardLayout and set the following properties:
Property Name Value Dock Fill DataSource tenMostExpensiveProductsBindingSource BindingX TenMostExpensiveProducts Binding UnitPrice Caption on c1DashboardLayout Ten Most Expensive Products - Drag and drop a PictureBox control. In the Properties window, navigate to the Image property and click the ellipsis button to open the Select Resource dialog.
In the Select Resource window, click Import button to import an image from your system and click OK. Now, set the following properties of pictureBox1:
Property Name Value SizeMode StrechImage Size 374, 225 Caption on c1DashboardLayout Logo - Drag and drop the ContextMenuStrip control, set it's Name property to customContextMenu. Now, add the following menu items to the ContextMenuStrip:
- Change Caption
- Export
- Change Image
- Remove
Observe: The ContextMenuStrip control gets added to the Component tray.
Click the ContextMenuStrip smart tag and select Edit Items. The Items Collection Editor opens.
Observe the following members corresponding to the menu items you added are automatically added to the list:- changeCaptionToolStripMenuItem
- exportToolStripMenuItem
- changeImageToolStripMenuItem
- removeToolStripMenuItem
- Switch to the code view and add the following code:
C# コードのコピーprivate void CustomContextMenu_Opening(object sender, System.ComponentModel.CancelEventArgs e) { //Change Image and Export options need to be shown selectively so they are disabled initially. changeImageToolStripMenuItem.Enabled = false; exportToolStripMenuItem.Enabled = false; //Depending on the type of control contained within the child container //the Export and Change Image //options are enabled foreach (Control control in c1DashboardLayout1.GetSelectedItem().Items) { //If the selected child container contains a Flexgrid or FlexChart //the export option is enabled. if (control is C1FlexGrid || control is FlexChart) { exportToolStripMenuItem.Enabled = true; } //If the selected child container contains a PictureBox control //the change image option is enabled. if (control is PictureBox) { changeImageToolStripMenuItem.Enabled = true; } } } private void ToolStripMenuItem_Click(object sender, EventArgs e) { ToolStripMenuItem item = (ToolStripMenuItem)sender; switch (item.Name) { case "changeCaptionToolStripMenuItem": //Creates a new form which takes new Caption of the item container as input from the user. CaptionChangeForm captionChangeForm = new CaptionChangeForm( c1DashboardLayout1.GetSelectedItem().Caption); if (captionChangeForm.ShowDialog() == DialogResult.OK) c1DashboardLayout1.SetCaption(c1DashboardLayout1.GetSelectedItem().ItemContainer, captionChangeForm.NewCaption); captionChangeForm.Dispose(); break; case "exportToolStripMenuItem": //Exports the FlexGrid to an Excel file and FlexChart to an image //if the selected item container contains a FlexGrid or FlexChart foreach (Control control in c1DashboardLayout1.GetSelectedItem().Items) { if (control is C1FlexGrid) { var dialog = new SaveFileDialog() { Filter = "Excel Files|*.xls;*xlsx;*xlsm" }; if (dialog.ShowDialog() == DialogResult.OK) { ((C1FlexGrid)control).SaveExcel(dialog.FileName, FileFlags.AsDisplayed); } } else if (control is FlexChart) { var dialog = new SaveFileDialog() { Filter = "PNG|*.png|JPEG |*.jpeg|SVG|*.svg" }; if (dialog.ShowDialog() == DialogResult.OK) { using (Stream stream = dialog.OpenFile()) { var extension = dialog.FileName.Split('.')[1]; ImageFormat fmt = (ImageFormat)Enum.Parse(typeof(ImageFormat), extension, true); ((FlexChart)control).SaveImage(stream, fmt, 500, 800); } } } } break; case "changeImageToolStripMenuItem": //Allows users to browse and change image file which is shown in the PictureBox //if the selected item container contains a PictureBox control foreach (Control control in c1DashboardLayout1.GetSelectedItem().Items) { if (control is PictureBox) { var imageDialog = new OpenFileDialog() { Filter = "PNG|*.png|JPEG |*.jpeg|SVG|*.svg", Title = "Browse Image files" }; if (imageDialog.ShowDialog() == DialogResult.OK) ((PictureBox)control).Image = Image.FromFile(imageDialog.FileName); } } break; case "removeToolStripMenuItem": //Removes the selected item container from the DashboardCollection c1DashboardLayout1.Items.Remove(c1DashboardLayout1.GetSelectedItem().Id); break; } } private void Form1_Load(object sender, EventArgs e) { // TODO: This line of code loads data into the 'c1NWindDataSet.Ten_Most_Expensive_Products' //table. You can move, or remove it, as needed. this.ten_Most_Expensive_ProductsTableAdapter.Fill(this.c1NWindDataSet.Ten_Most_Expensive_Products); c1DashboardLayout1.Options.ContextMenuStrip = customContextMenu; customContextMenu.Opening += CustomContextMenu_Opening; for (int i = 0; i < customContextMenu.Items.Count; i++) { customContextMenu.Items[i].Click += ToolStripMenuItem_Click; } }
- Add a new Form to the project and name it CaptionChangeForm. Add the following controls to the form and set their properties:
Control Property Value Label Text Caption TextBox Name captionTextBox Button Name saveButton Button Text Save - Switch to the code view and add the following code:
A dashboard gets created wherein you can use the custom context menu.
C# コードのコピーpublic partial class CaptionChangeForm : Form { //NewCaption is a public property which is accessed in Form1 //to change the child container's Caption public string NewCaption { get; set; } public CaptionChangeForm(string oldCaption) { InitializeComponent(); captionTextBox.Text = oldCaption; } private void saveButton_Click(object sender, EventArgs e) { //Sets the value of NewCaption property and closes the form if (captionTextBox.Text != String.Empty) { NewCaption = captionTextBox.Text; this.DialogResult = DialogResult.OK; } this.Close(); } }