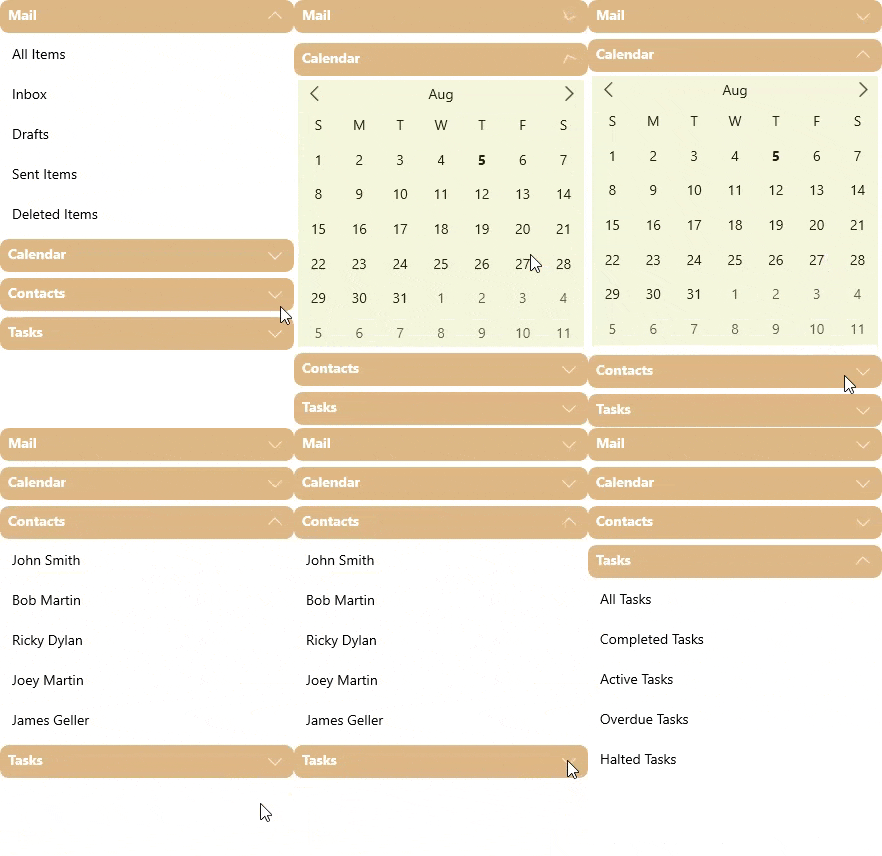
The following quick start guide is intended to get you up and running with the Accordion control. In this quick start, you'll start with creating a new WinUI application, add the Accordion control to it, and then add items in the content area of the control.
The following GIF displays the Accordion control in action.

Create a WinUI Application and add References
- In Visual Studio, create a new WinUI App. For detailed steps, see Configure WinUI Application.
- In the Solution Explorer, right click Dependencies and select Manage NuGet Packages.
- In NuGet Package Manager, select nuget.org as the Package source.
- Search and select the following package and click Install.
- C1.WinUI.Accordion
- C1.WinUI.Core
- C1.WinUI.Calendar
Configure the Accordion control
- Declare the namespace using the following code in XAML:
XAML コードのコピーxmlns:c1="using:C1.WinUI.Accordion" xmlns:core="using:C1.WinUI.Core" xmlns:calendar="using:C1.WinUI.Calendar"
- Add the Accordion control and style property setters for the control and its content inside <Grid></Grid> tag, using the following code:
XAML コードのコピー<Grid.Resources> <Style x:Key="ExpanderStyle" TargetType="c1:C1Expander"> <Setter Property="Margin" Value="3"/> <Setter Property="HeaderStyle"> <Setter.Value> <Style TargetType="core:C1ToggleButton"> <Setter Property="Background" Value="BurlyWood"/> <Setter Property="Foreground" Value="White"/> <Setter Property="FontWeight" Value="Bold"/> <Setter Property="CornerRadius" Value="8"/> </Style> </Setter.Value> </Setter> </Style> </Grid.Resources> <!--Accordion コントロール--> <c1:C1Accordion x:Name="accordion" Width="300" Margin="25"></c1:C1Accordion> - Add four Expander controls with items, namely three ListView controls and a Calendar, to the Accordion by adding the following code between the <c1:C1Accordion> and</c1:C1Accordion> tag.
XAML コードのコピー<!--ListViewを備えた最初のExpander--> <c1:C1Expander Header="Mail" Style="{StaticResource ExpanderStyle}"> <ListView> <ListViewItem Content="All Items"/> <ListViewItem Content="Inbox"/> <ListViewItem Content="Drafts"/> <ListViewItem Content="Sent Items"/> <ListViewItem Content="Deleted Items"/> </ListView> </c1:C1Expander> <!--カレンダー付きの2番目のExpander--> <c1:C1Expander Header="Calendar" Style="{StaticResource ExpanderStyle}"> <calendar:C1Calendar Background="Beige" VerticalAlignment="Top" DayOfWeekFormat="d" Margin="4"/> </c1:C1Expander> <!--ListViewを備えた3番目のExpander--> <c1:C1Expander Header="Contacts" Style="{StaticResource ExpanderStyle}"> <ListView> <ListViewItem Content="John Smith"/> <ListViewItem Content="Bob Martin"/> <ListViewItem Content="Ricky Dylan"/> <ListViewItem Content="Joey Martin"/> <ListViewItem Content="James Geller"/> </ListView> </c1:C1Expander> <!--ListViewを備えた4番目のExpander--> <c1:C1Expander Header="Tasks" Style="{StaticResource ExpanderStyle}"> <ListView> <ListViewItem Content="All Tasks"/> <ListViewItem Content="Completed Tasks"/> <ListViewItem Content="Active Tasks"/> <ListViewItem Content="Overdue Tasks"/> <ListViewItem Content="Halted Tasks"/> </ListView> </c1:C1Expander>
Build and Run the Project
- Click Build | Build Solution to build the project.
- Press F5 to run the project.